The Process of Making Platelet-Rich Plasma (PRP). Platelet-Rich Plasma (PRP) has gained significant attention in the medical field for its potential regenerative properties. It is a concentrated solution of platelets derived from the patient’s own blood, rich in growth factors and cytokines that aid in tissue repair and healing. The process of making PRP involves several crucial steps to ensure the final product is of high quality and effectiveness.
Step 1: Patient Evaluation
Before initiating the PRP procedure, the patient undergoes a thorough evaluation by a healthcare professional. This evaluation helps determine if the patient is an appropriate candidate for PRP therapy and assesses the specific medical condition that needs treatment. Conditions such as tendon injuries, osteoarthritis, and certain chronic wounds are commonly treated with PRP.
Step 2: Blood Collection
Once the patient is deemed suitable for PRP therapy, a small amount of their blood is drawn, usually from the arm, using a sterile needle and syringe. The amount of blood collected depends on the intended use of PRP and the treatment area. Typically, 30 to 60 milliliters of blood is sufficient for most PRP procedures.
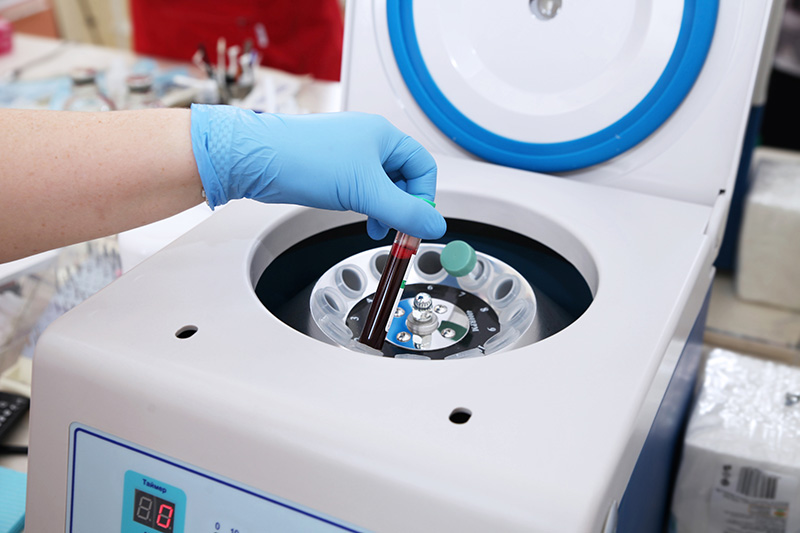
Step 3: Centrifugation
The collected blood is then placed into a specialized centrifuge machine. Centrifugation is a critical step in the PRP-making process as it separates the blood into its various components based on their density. During the spinning process, the blood is subjected to rapid rotation, causing the heavier red blood cells to settle at the bottom, the platelet-rich plasma in the middle, and the platelet-poor plasma at the top.
Step 4: Harvesting PRP
After the centrifugation is complete, the separated PRP layer is carefully extracted from the tube using a sterile syringe. To ensure the highest concentration of platelets, the technologist may take only the middle layer, which is the platelet-rich portion of the plasma. This PRP is then collected and transferred to a new container, ready for application.
Step 5: Activation (Optional)
In some cases, the PRP may undergo activation before use. Activation involves adding a substance like calcium chloride or thrombin to the PRP to trigger the release of growth factors and enhance its regenerative properties. However, not all PRP treatments require activation, and the decision depends on the medical professional’s judgment.
Step 6: Application
With the PRP now prepared, it is ready for application. The healthcare professional will apply the PRP directly to the affected area, such as a joint, tendon, or wound, depending on the patient’s condition. PRP injections can be done using ultrasound or fluoroscopic guidance to ensure precise placement and maximum effectiveness.
Step 7: Post-Treatment Care
After the PRP application, patients are typically advised to avoid strenuous activities for a short period and follow any specific post-treatment care instructions given by their healthcare provider. The healing and regenerative effects of PRP may take several weeks to months to fully manifest, depending on the individual’s condition and response to the therapy.
In conclusion, the process of making Platelet-Rich Plasma is a meticulous and scientifically driven procedure that involves collecting the patient’s blood, separating and concentrating the platelets, and ultimately applying the PRP to the targeted area for potential healing and regeneration. As research into PRP continues, it holds promise as a non-invasive and safe therapeutic option for various medical conditions. However, patients should always consult with qualified healthcare professionals to determine if PRP is the right treatment for their specific needs.